Set Up In-App Purchases & Subscriptions with RevenueCat + Capacitor
Let's set up in-app purchases & subscriptions in your NextNative app using RevenueCat.
What's RevenueCat?
RevenueCat handles all the complex stuff with in-app purchases so you don't have to. It works across iOS and Android, and gives you a simple API to work with.
Setting up RevenueCat
1. Create a RevenueCat account
Head over to RevenueCat (opens in a new tab) and create an account
Before you can start using RevenueCat to fetch products, you must configure your products in the respective stores. See the following guides for App Store Connect (opens in a new tab), Google Play Console (opens in a new tab) for help navigating through this process.
If you are selling iOS products, be sure to sign your 'Paid Applications Agreement' and fill out your bank and tax information in App Store Connect > Agreements, Tax, and Banking. This needs to be completed before you can test any purchases.
2. Import configured products
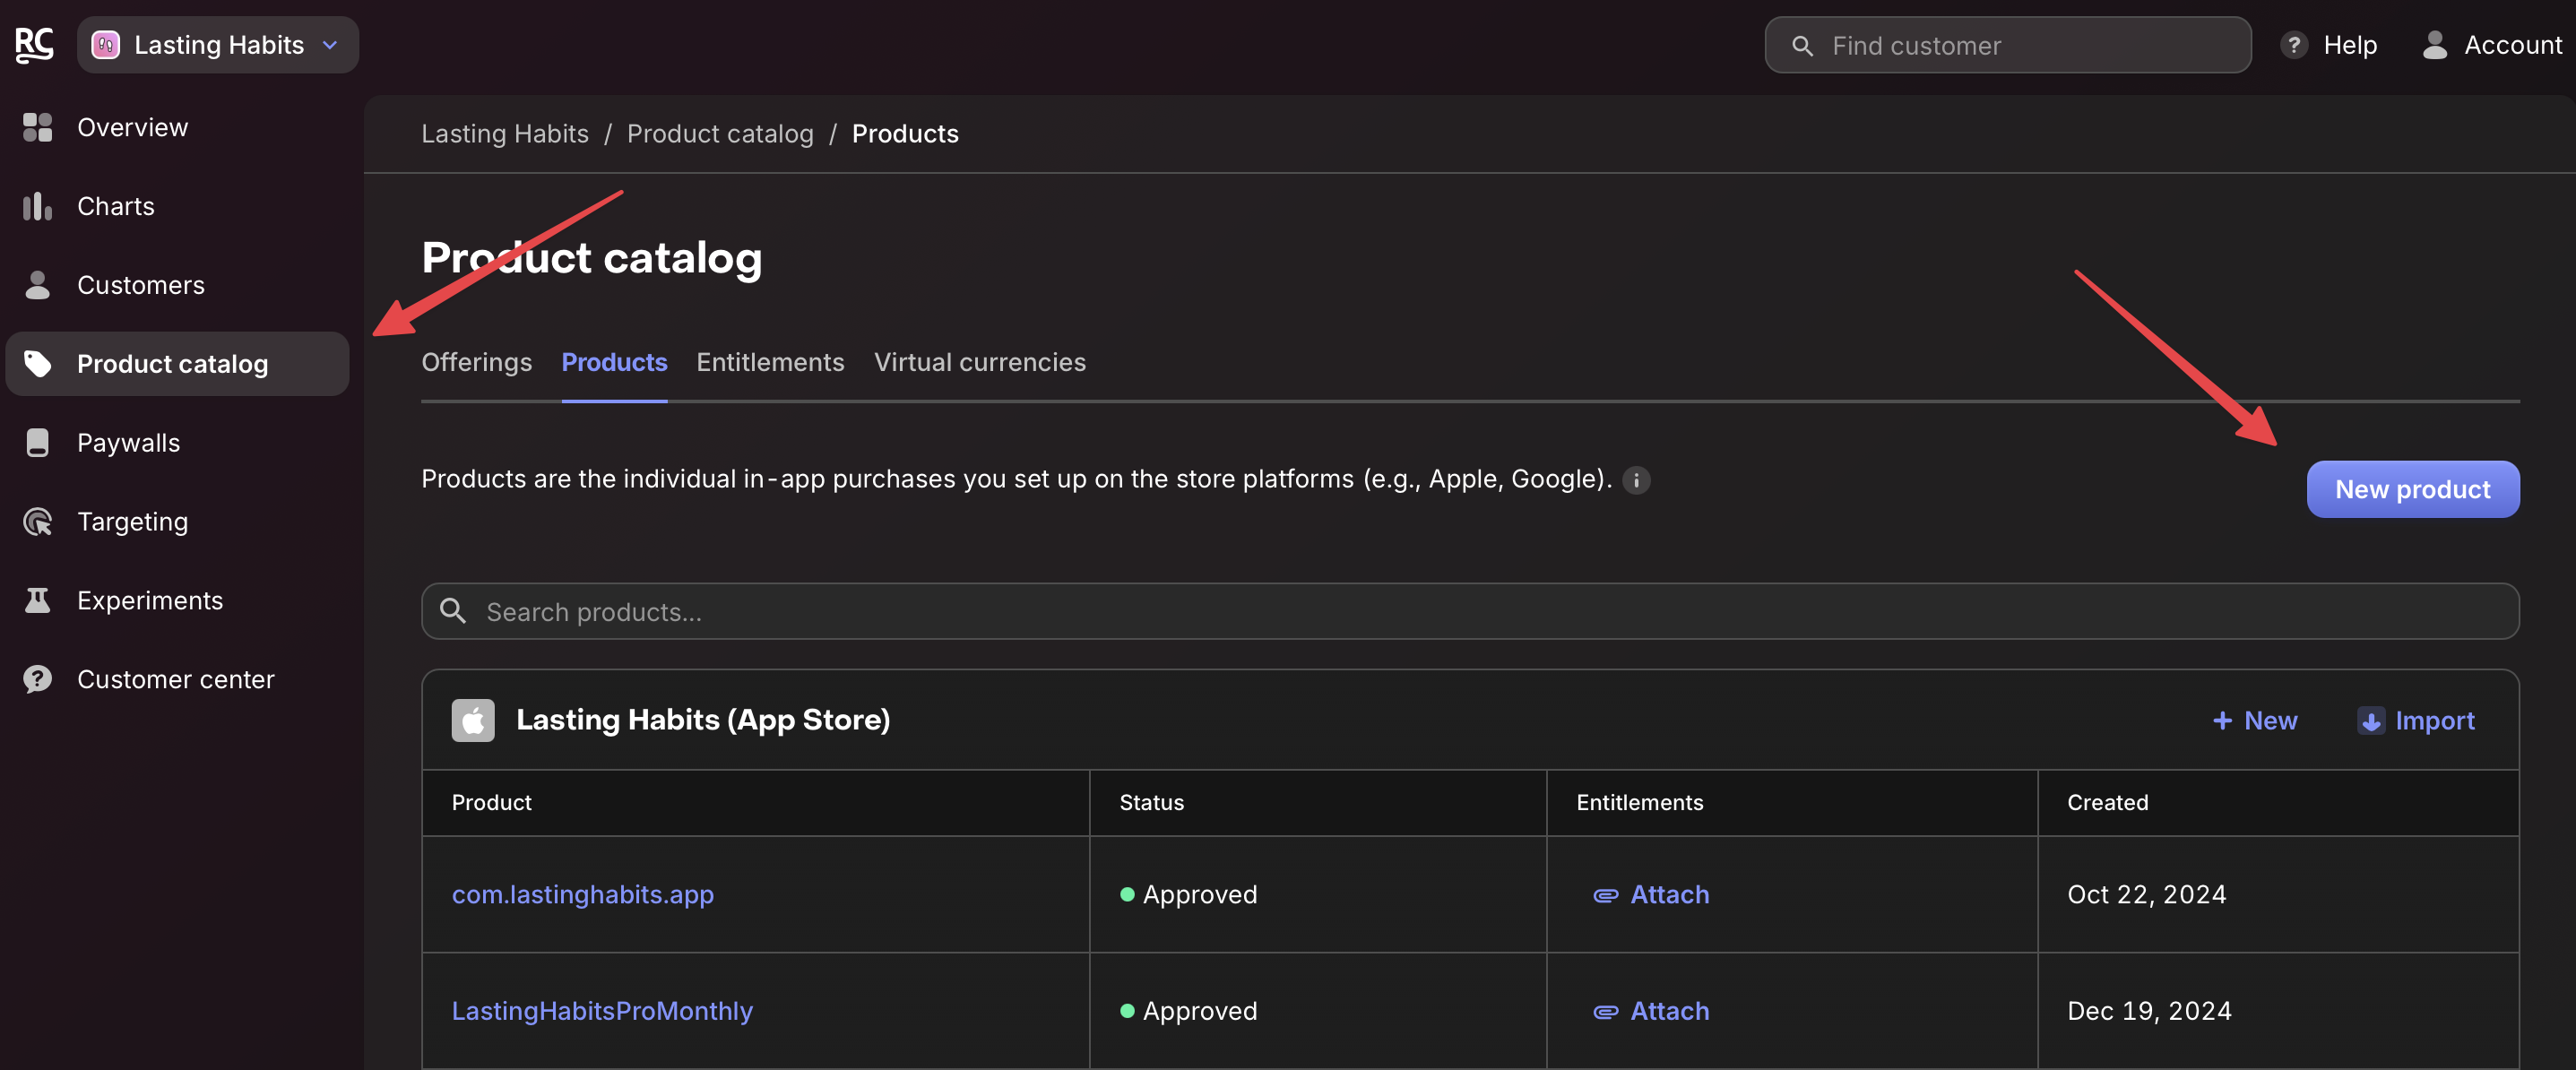
Once your in-app products have been configured in App Store Connect/Google, go to RevenueCat's dashboard, and create new products.

Products are the individual in-app purchases you set up on the store platforms (e.g., Apple, Google).
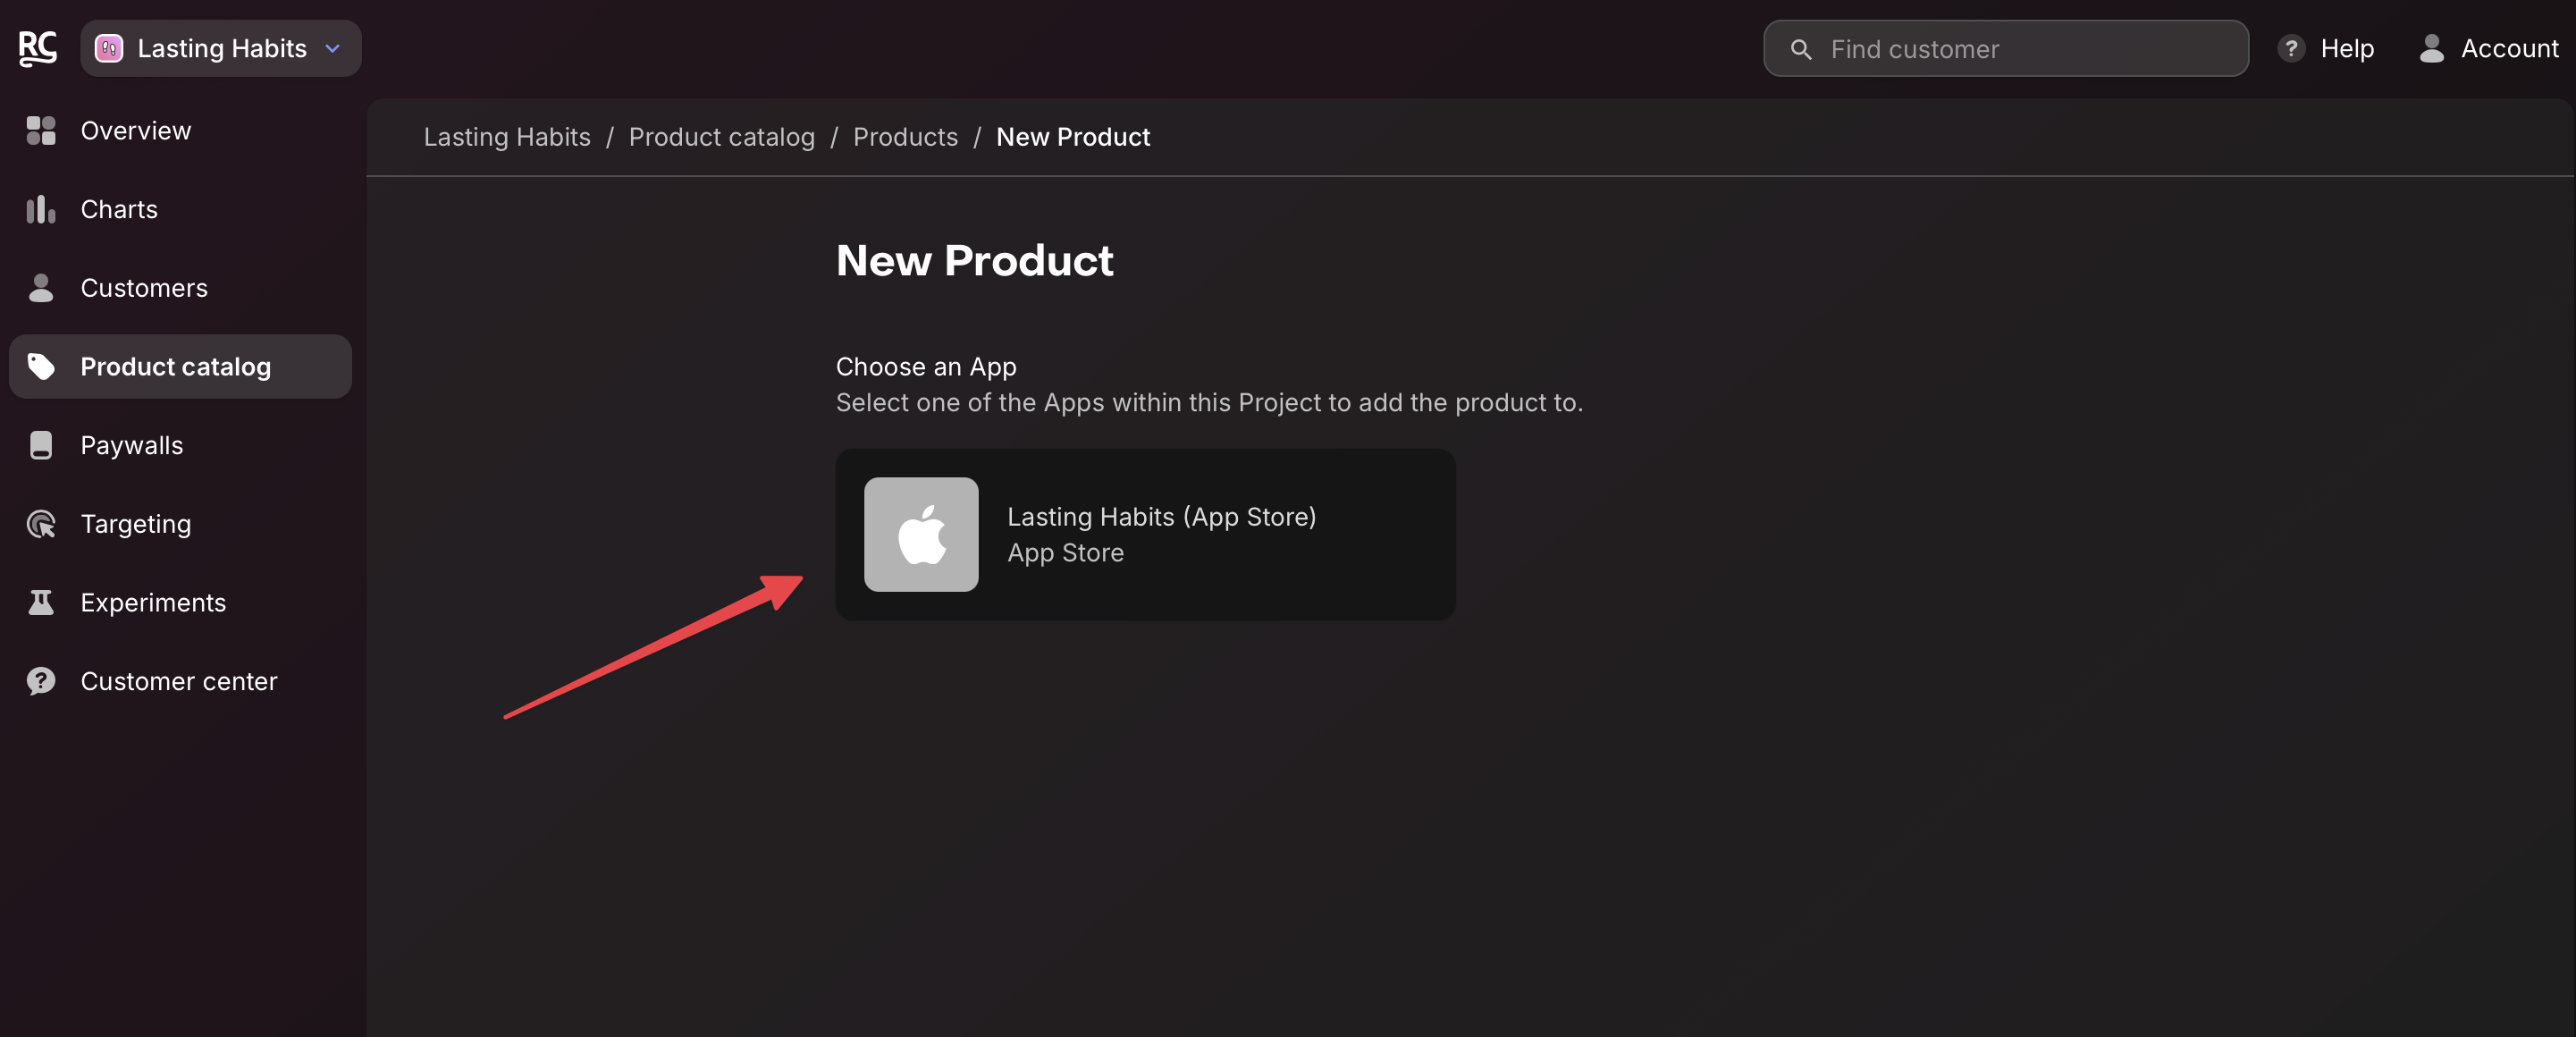
Choose the app that you set up in the Apple/Google.

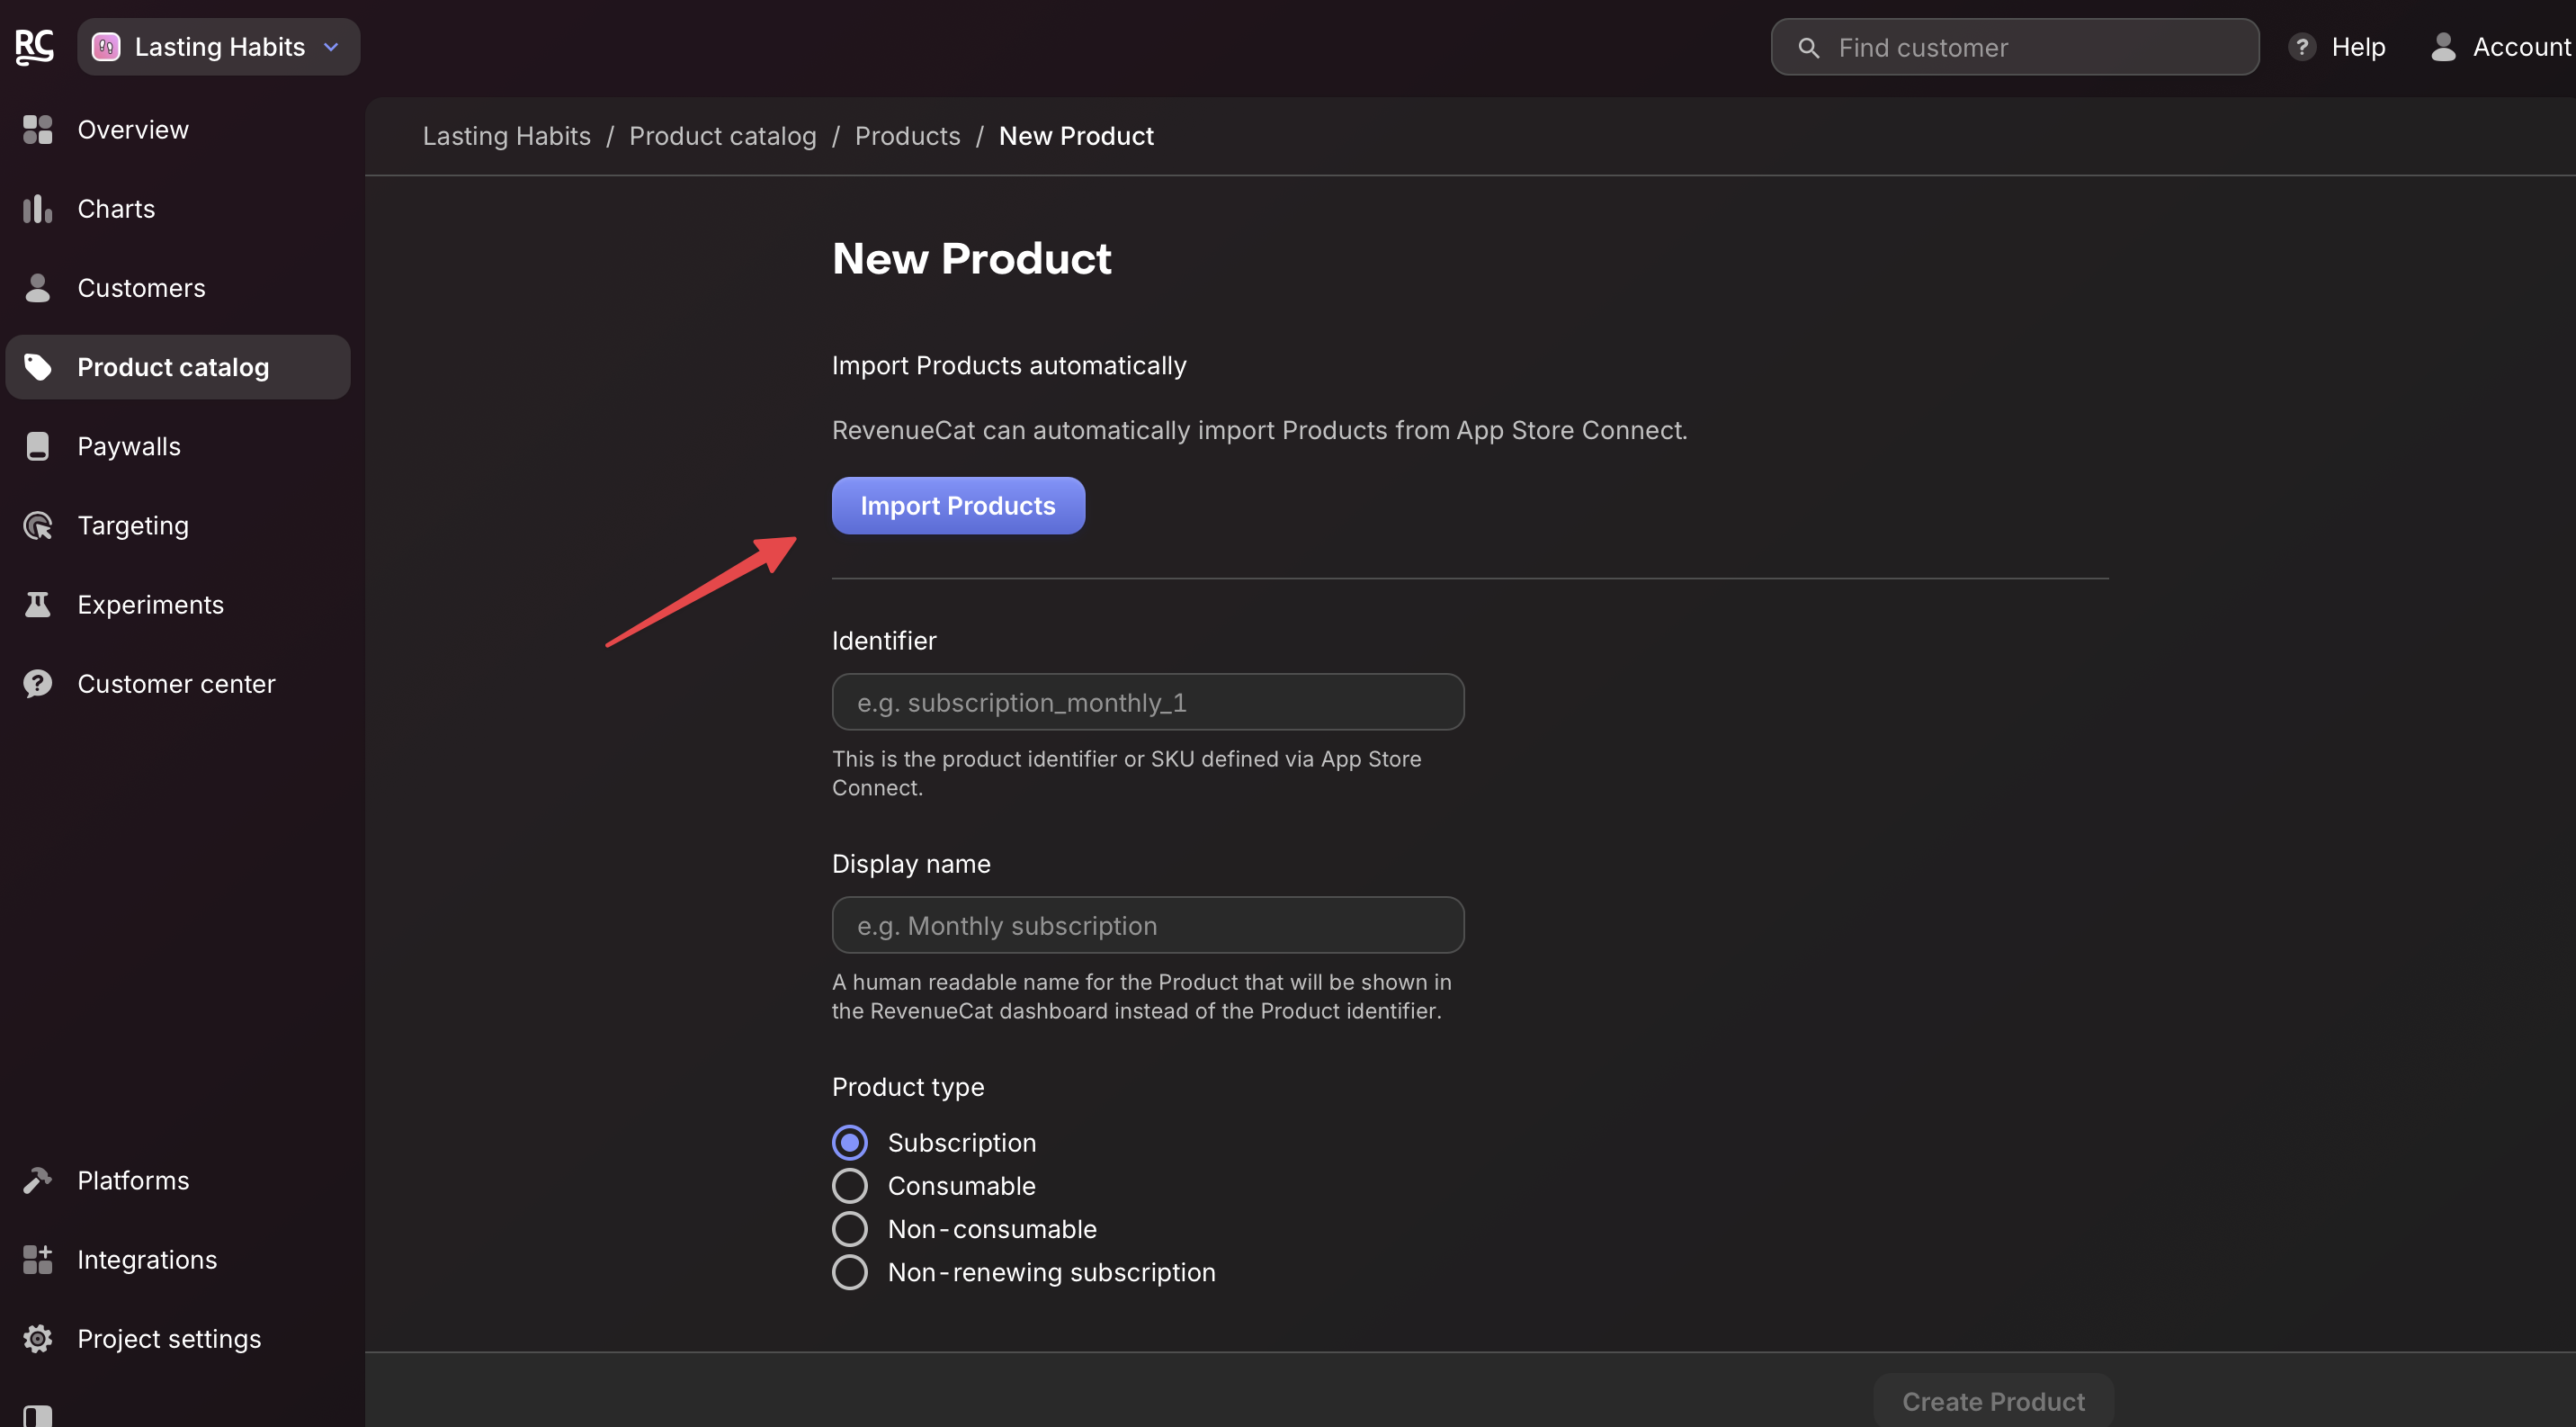
Click Import to add all products automatically.

3. Add api keys and product ids to .env.local
Then go to each product, copy its Identifier, and paste into .env file
NEXT_PUBLIC_REVENUECAT_API_KEY=your_revenuecat_key_here
NEXT_PUBLIC_REVENUECAT_MONTHLY_ID=your_monthly_product_id
NEXT_PUBLIC_REVENUECAT_ANNUALY_ID=your_annualy_product_id
NEXT_PUBLIC_REVENUECAT_LIFETIME_ID=your_lifetime_product_id
Using useRevenueCat in your app
useRevenueCat hook is located at services/revenue-cat.ts. It has all essentials functions to get payments from your users.
function PremiumFeature({ user }) {
  const {
    isPro,
    isInitialized,
    isLoading,
    customerInfo,
    error,
    purchase,
    restore,
  } = useRevenueCat(user.id);

  if (!isPro) {
    return (
      <div>
        <h2>Unlock Premium Features</h2>
        <button onClick={() => purchase("monthly")}>
          Go Premium - $4.99/month
        </button>
      </div>
    );
  }

  return <div>Welcome to premium features!</div>;
}
Testing on real devices before production
iOS
Follow this iOS guide (opens in a new tab)
Android
Follow this Android guide (opens in a new tab)
Testing Tips
- Use Apple/Google sandbox accounts for testing
- Check the RevenueCat dashboard to see purchases
- Test on real devices (the simulator is tricky with purchases)
That's it! RevenueCat makes in-app purchases & subscriptions way easier than doing it all yourself.
Check out their docs (opens in a new tab) for more details.